Creating Your First Bot
This guide walks you through creating your very first chatbot using the bot builder. No technical skills are required. Step…
This guide walks you through creating your very first chatbot using the bot builder. No technical skills are required.
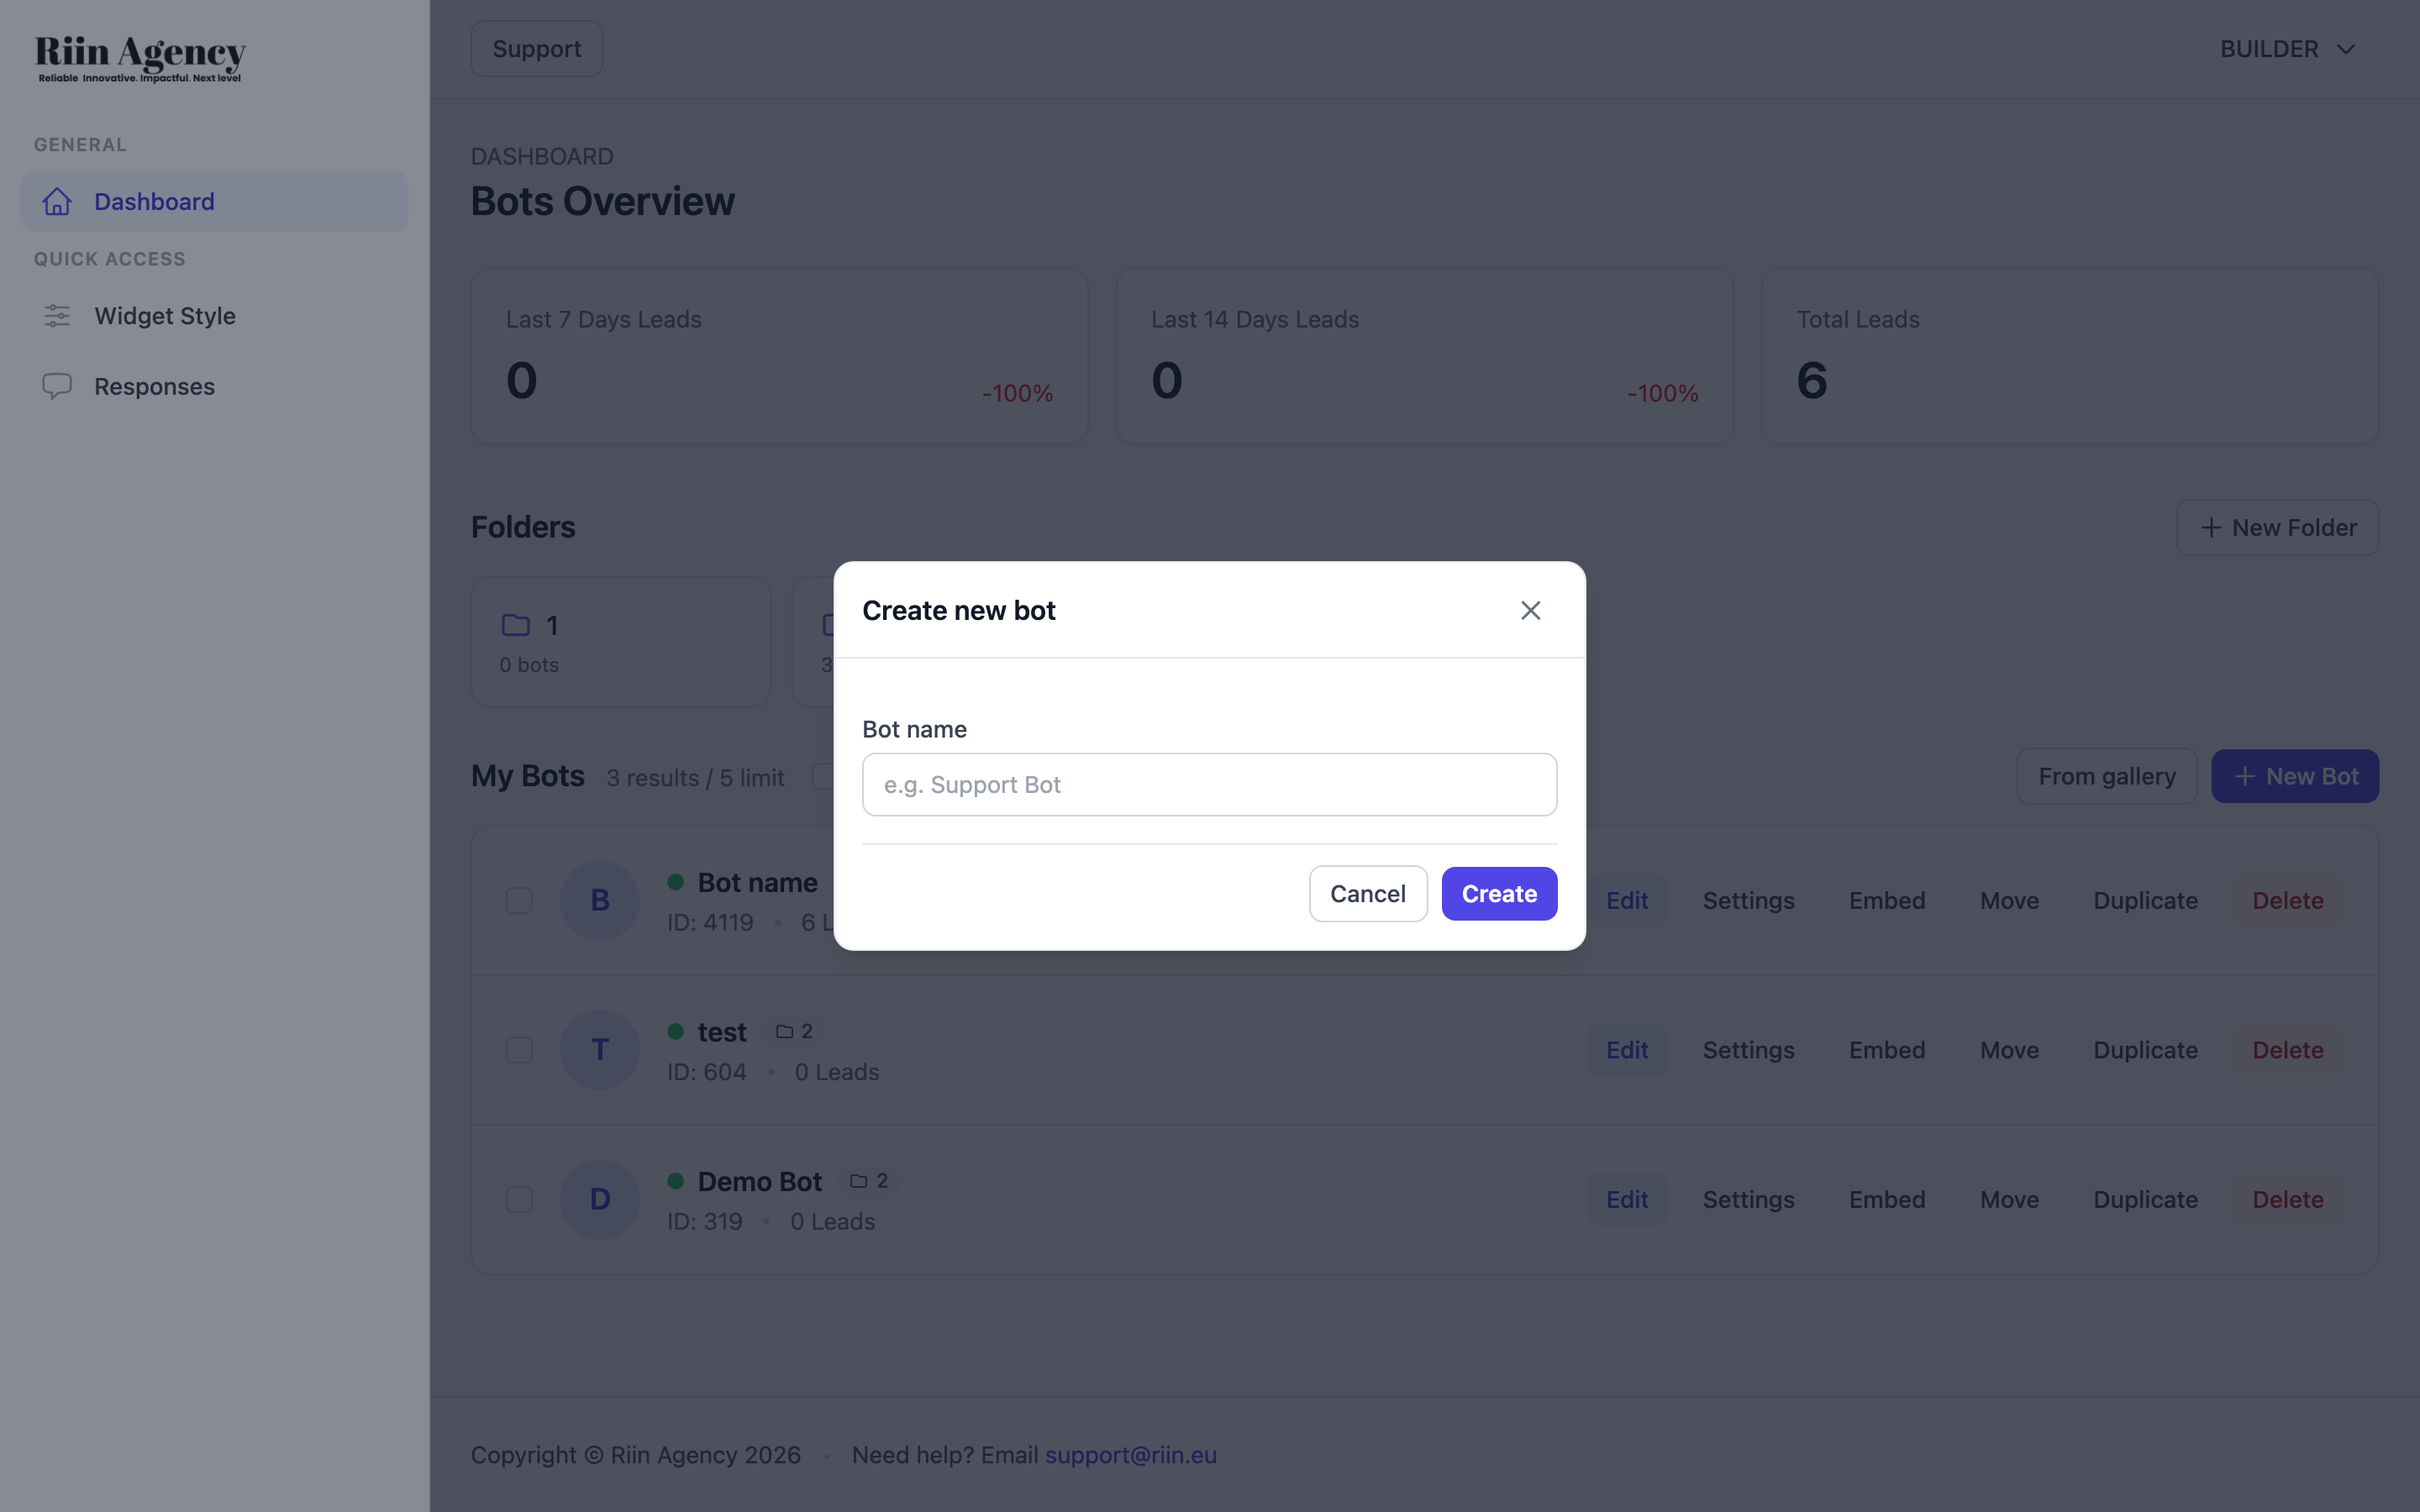
Step 1: Create a new bot
- Log in to your dashboard.
- Click + New Bot (top right).
- Give your bot a name (for example: Website Assistant) and click Create.
- Open the bot to access the Flow Builder.
Step 2: Understand the Flow Builder
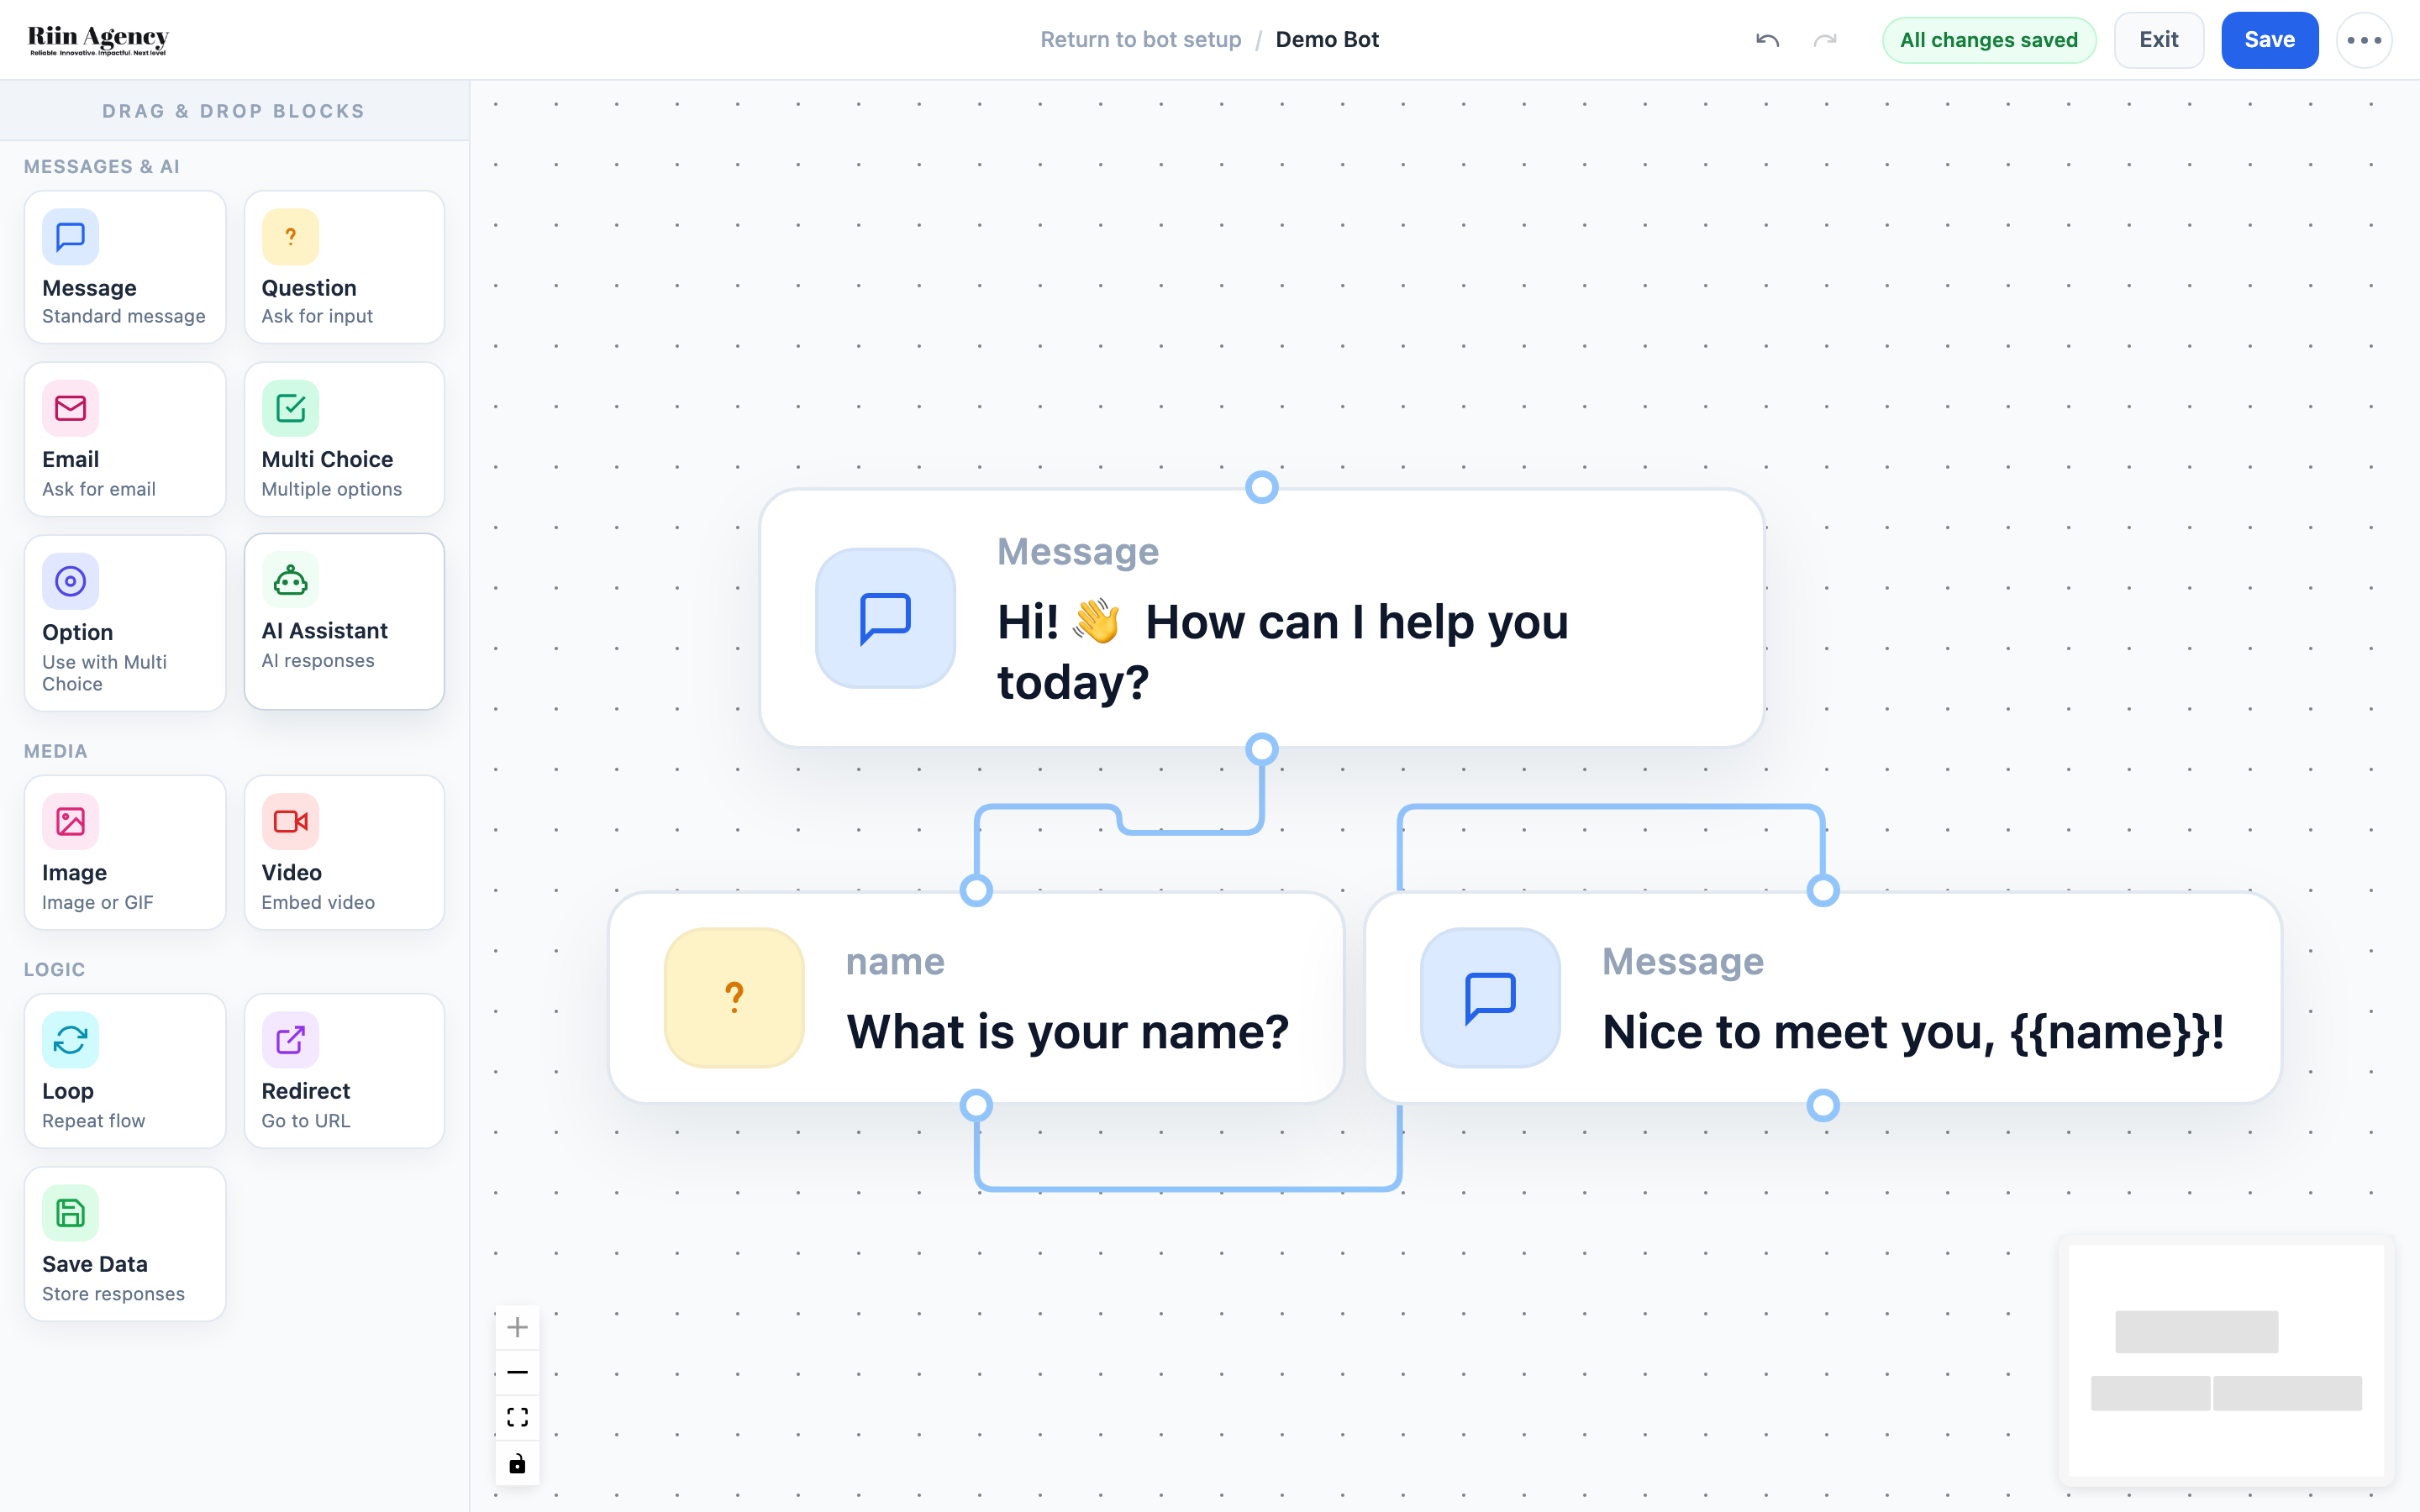
The Flow Builder is where you design the conversation.
- Blocks are on the left side
- The conversation flow is built in the center
- You connect blocks to control how the chat behaves
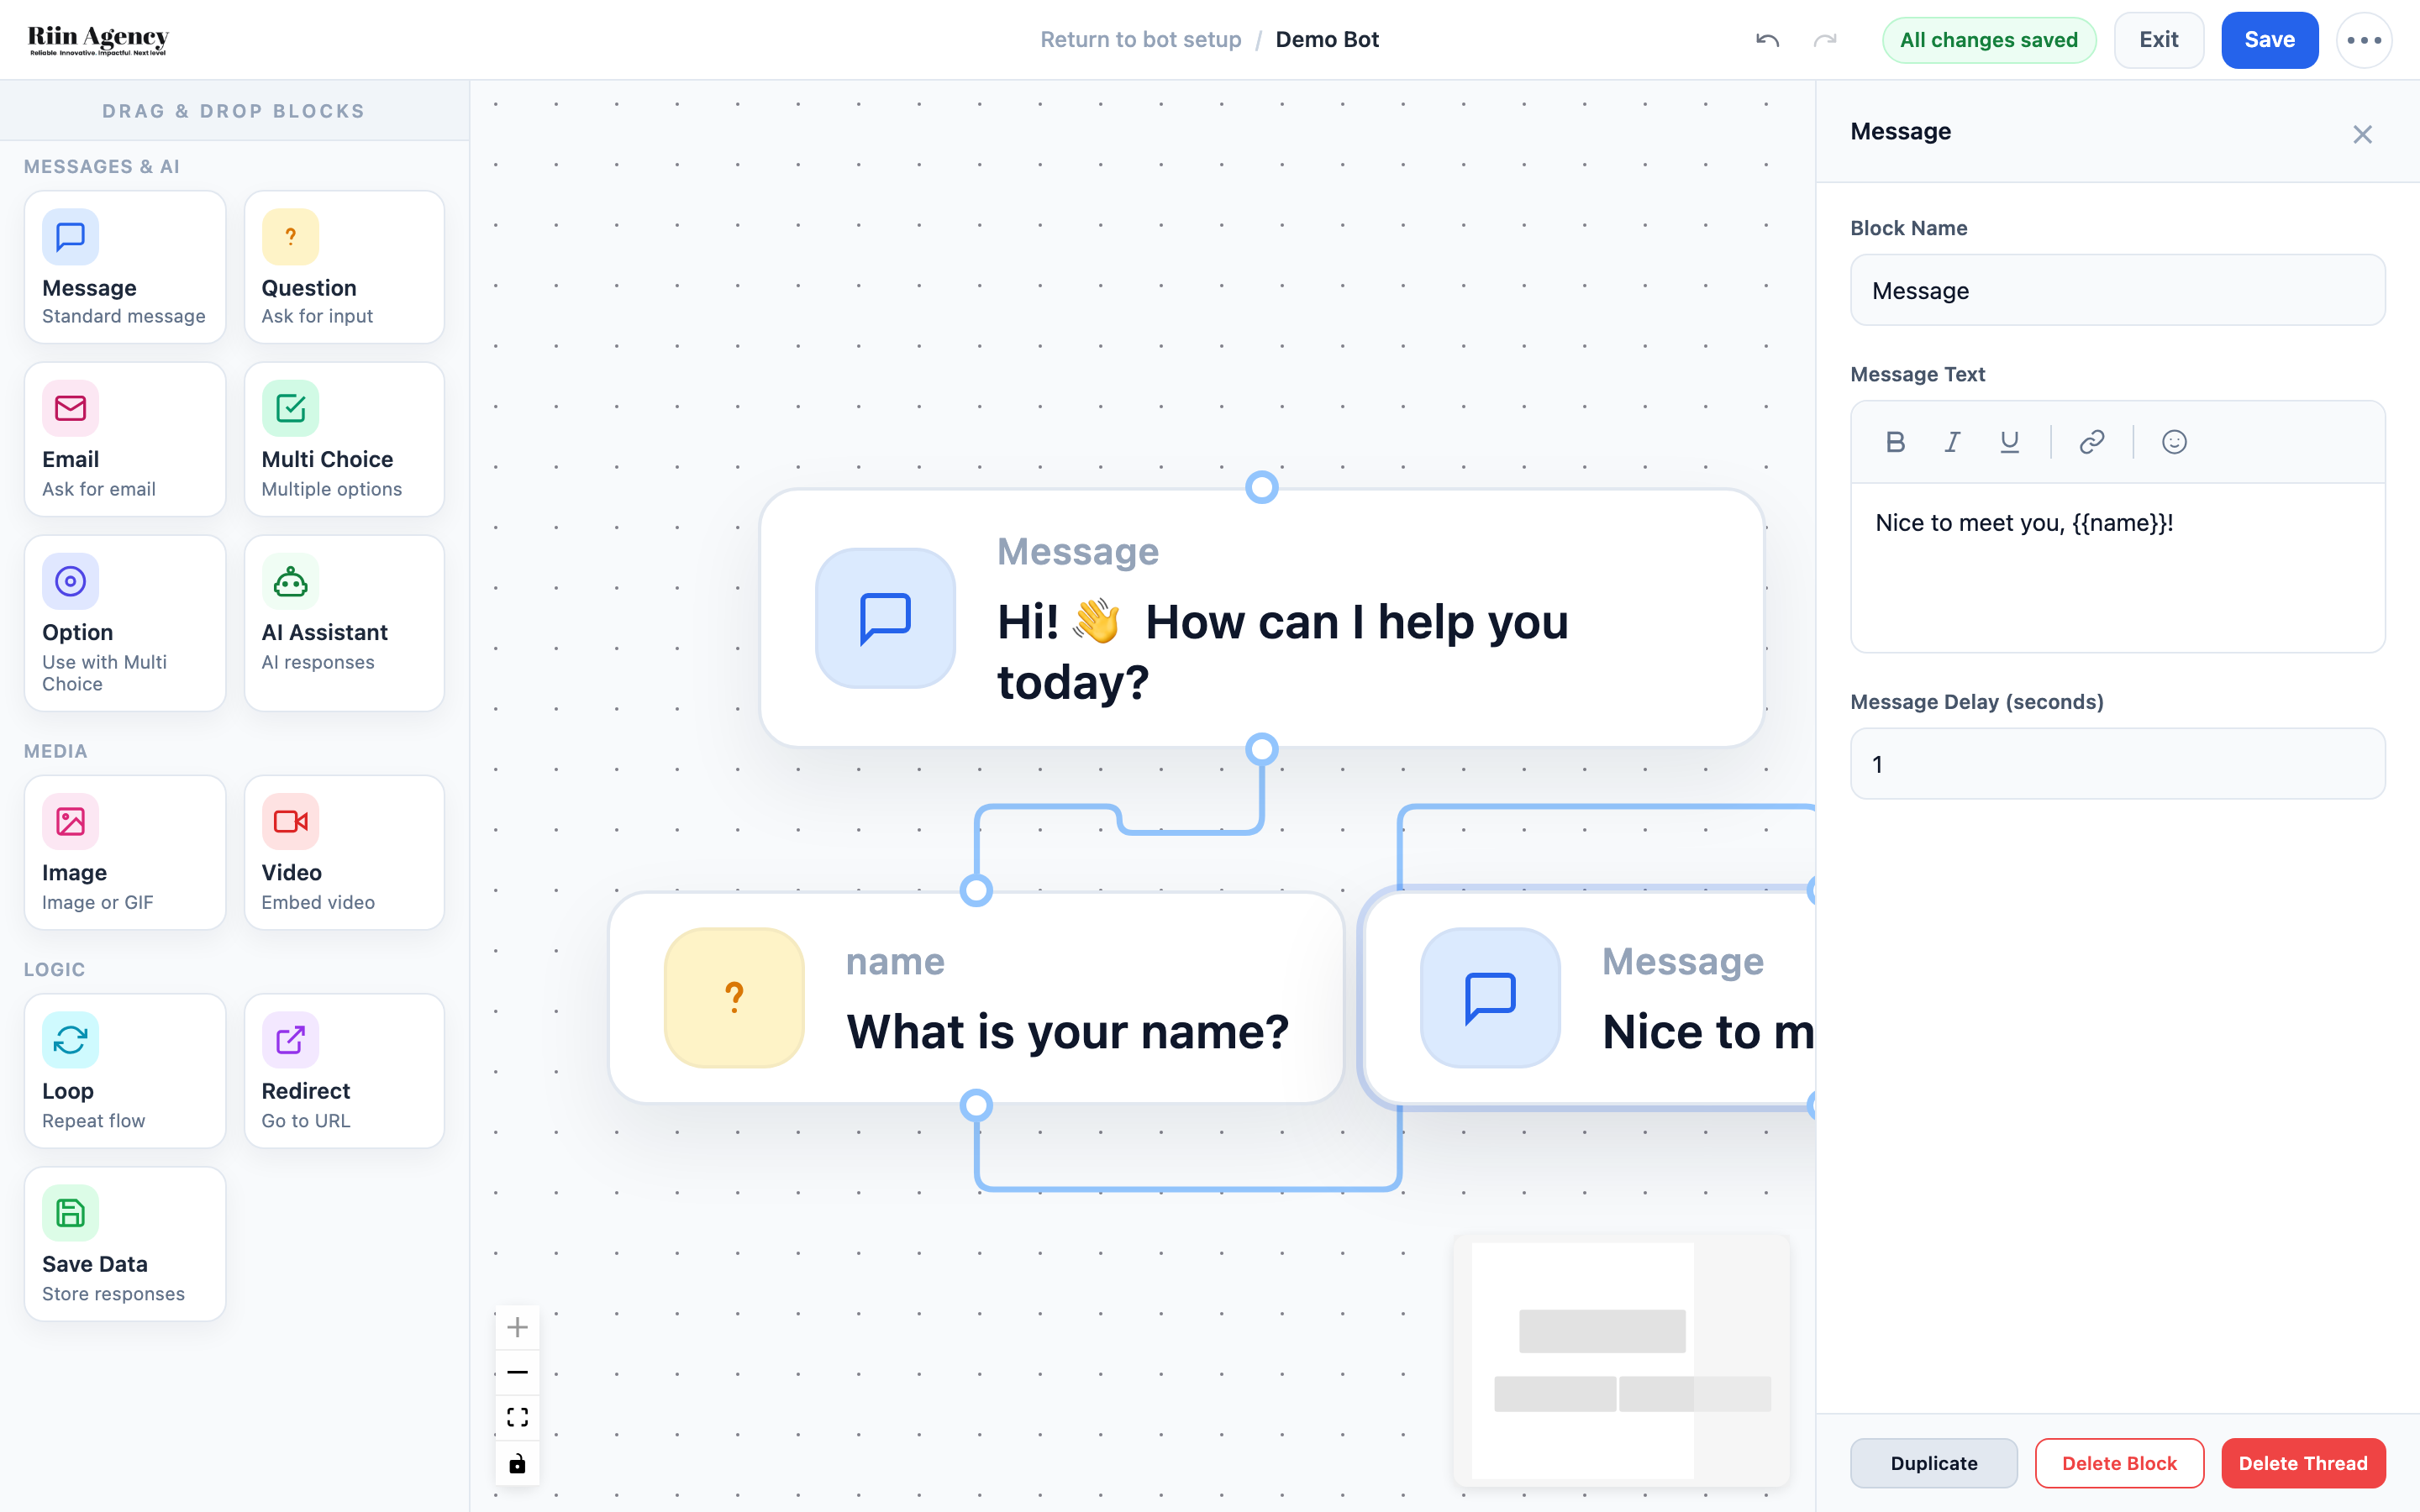
You build conversations by dragging blocks onto the canvas. To connect two blocks, drag a line from the small circle at the bottom of one block to the circle at the top of the next block.
Step 3: Add your first message
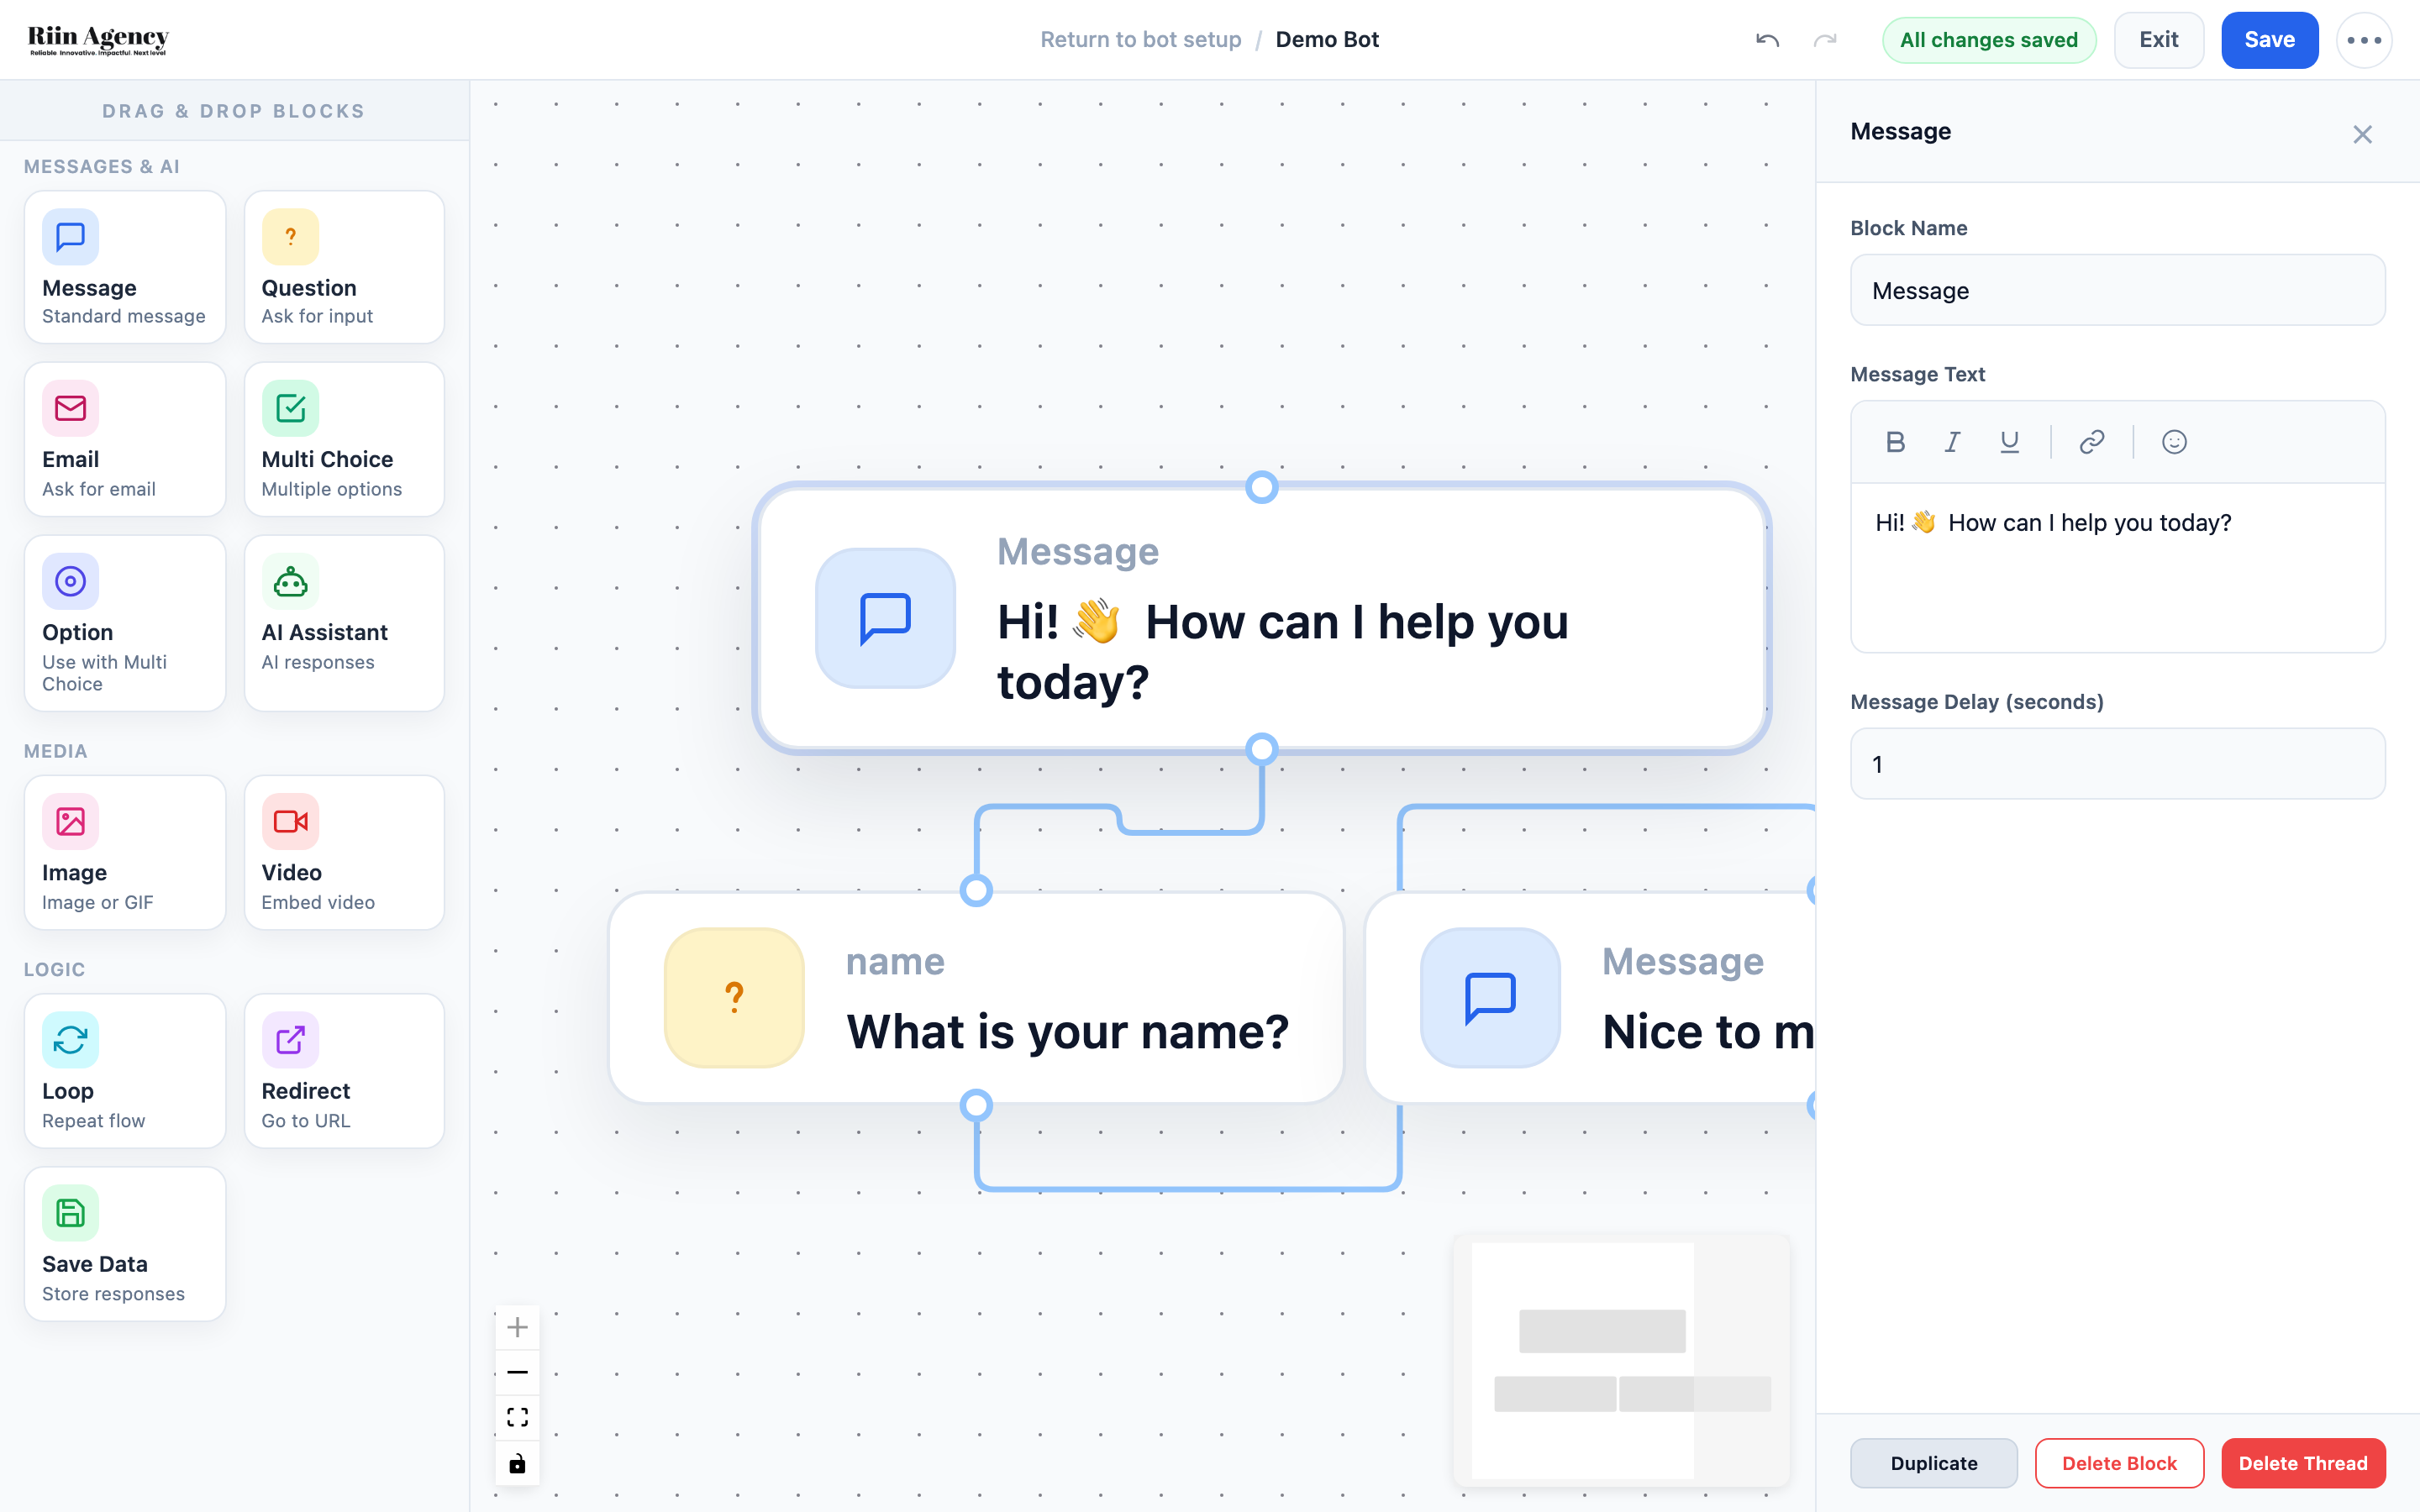
- Drag a Message block onto the canvas.
- Click the block. An editor opens on the right.
- Write a welcome message in the Message Text field, for example:
Hi! 👋 How can I help you today?
This is the first thing visitors will see.
Step 4: Ask a question and save the answer
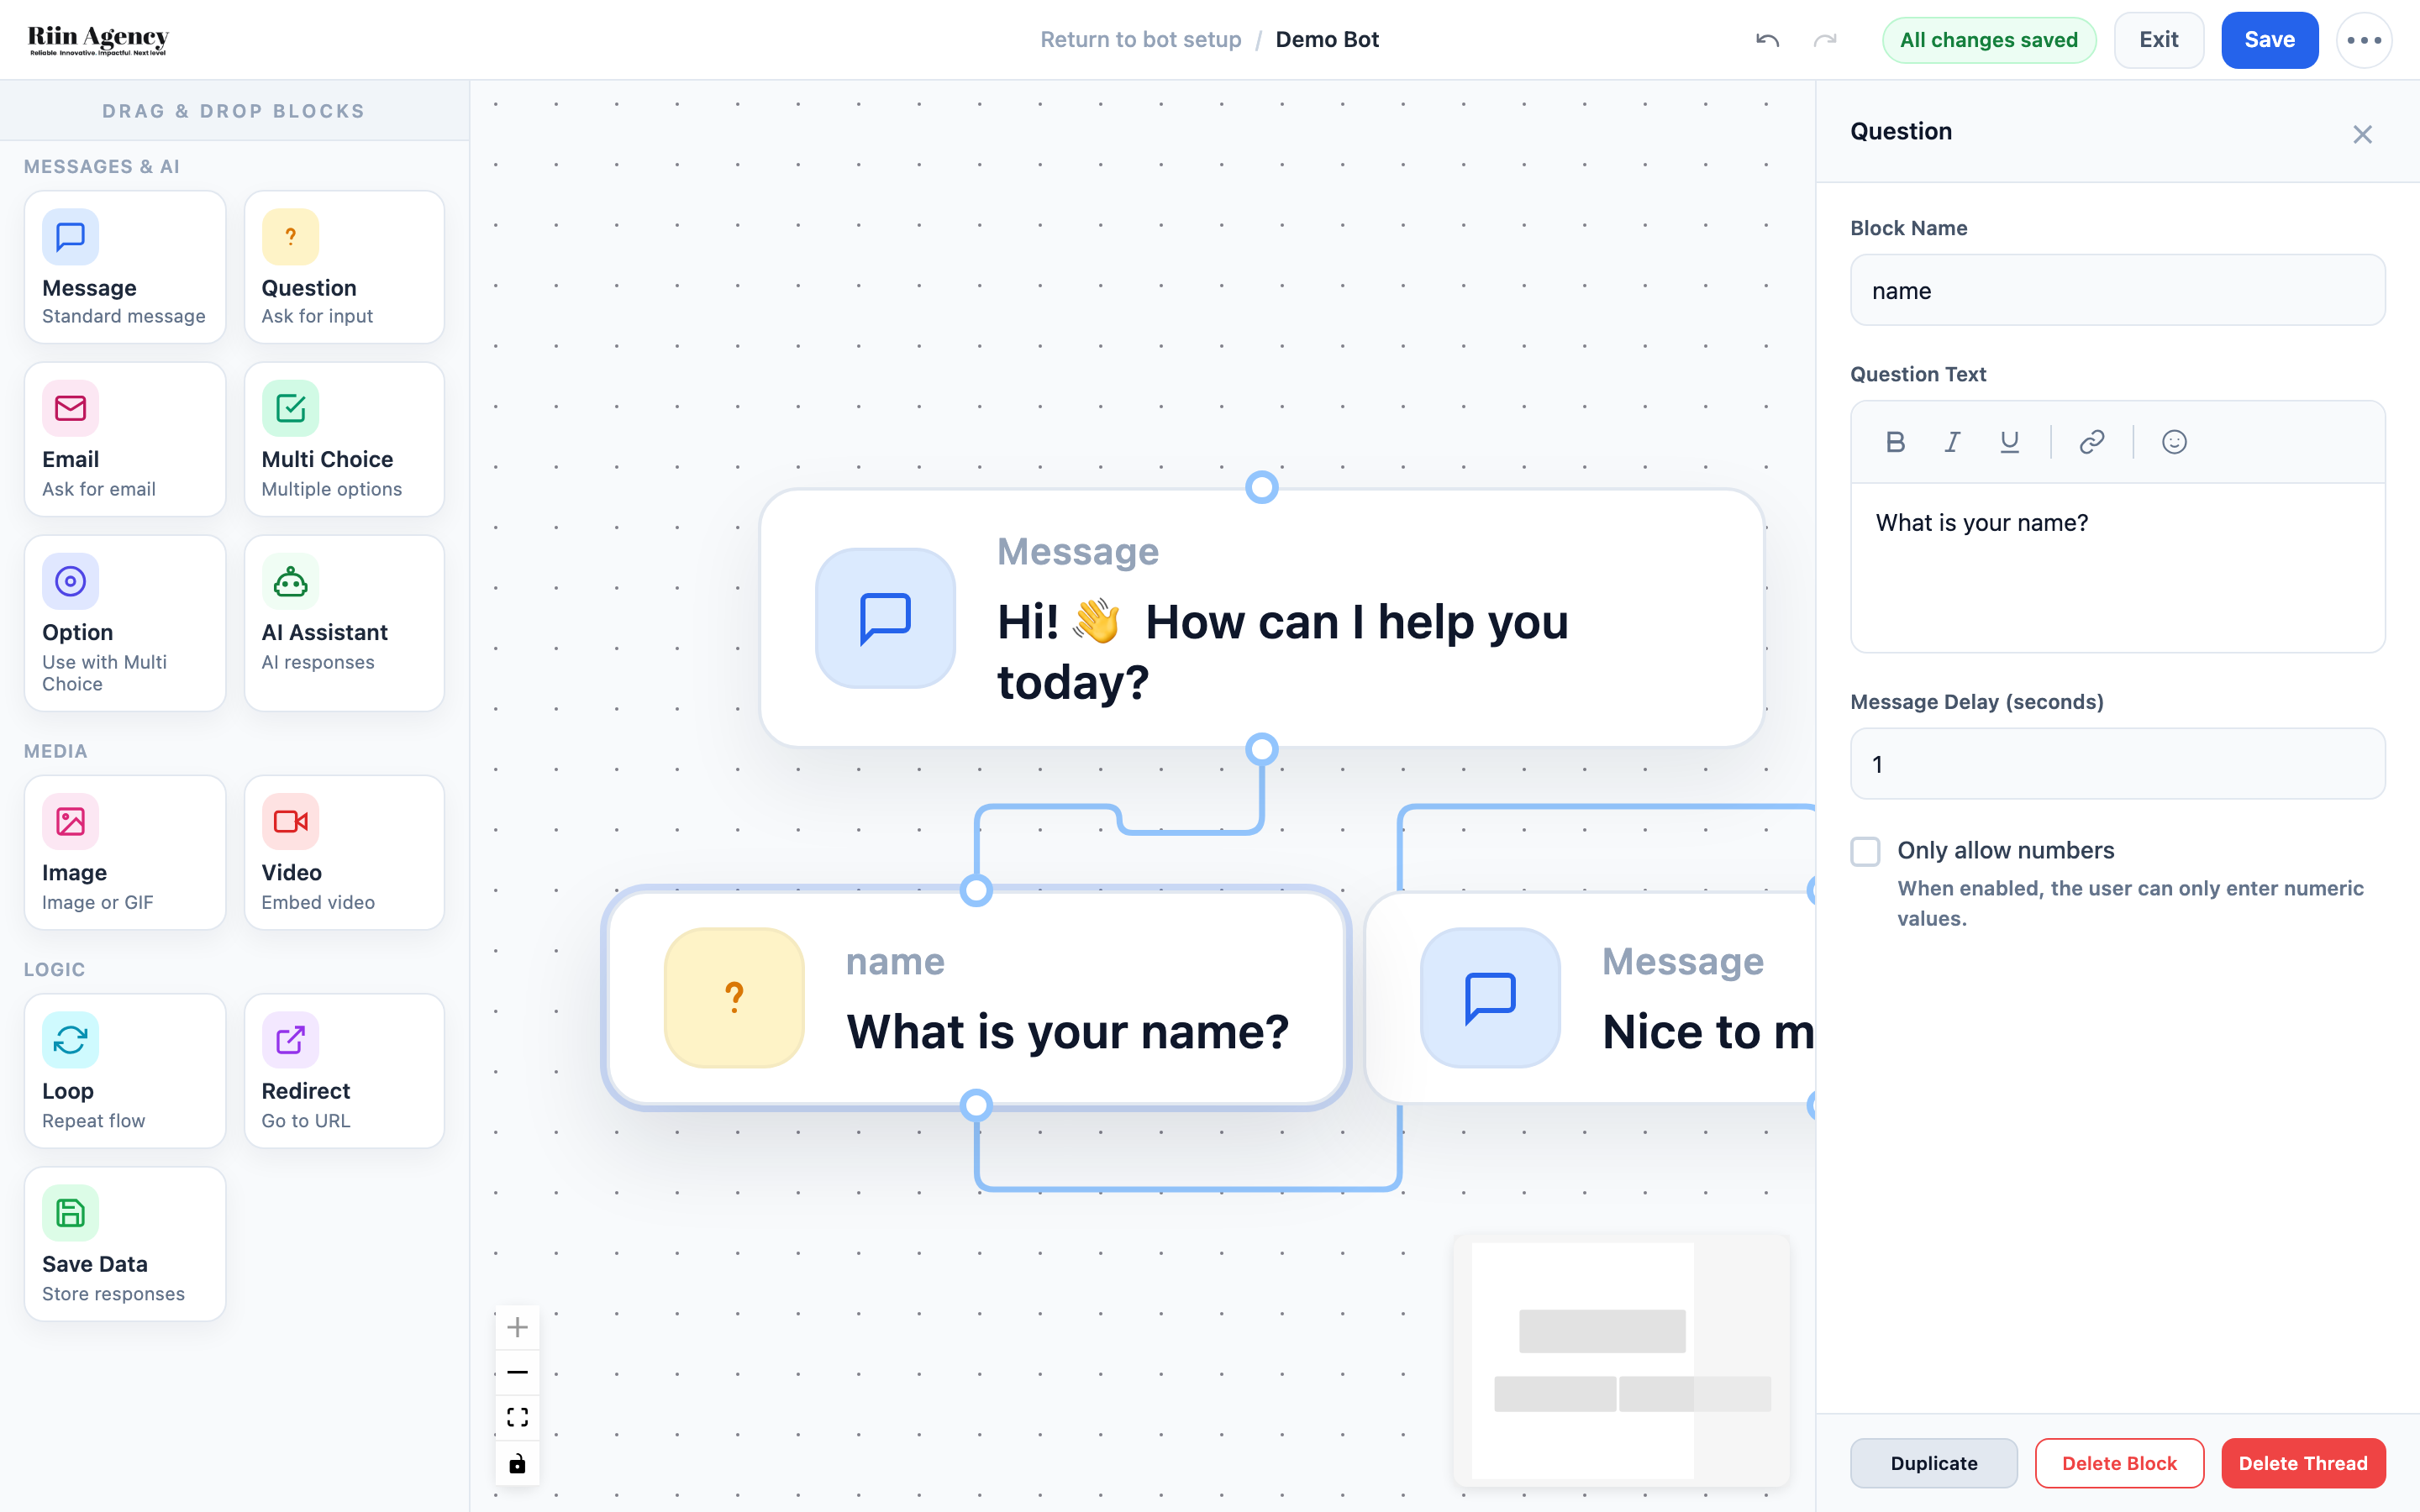
- Drag a Question block after the message.
- Click it and write your question in Question Text, like:
What is your name?
- Now the important part: change the Block Name to
name.
The Block Name is the variable. Whatever the visitor answers gets saved under this name, and you can reuse it later as {{name}}.
Step 5: Use the answer in a reply
- Add another Message block.
- Use the saved answer with double curly braces:
Nice to meet you, {{name}}!
The bot replaces {{name}} with whatever the visitor typed. This makes conversations feel personal.
Step 6: Connect the blocks
Drag a line from the bottom circle of the Message block to the top circle of the Question block. Then connect the Question block to your reply message the same way.
The conversation follows these lines, from top to bottom.
Step 7: Add options (optional)
To guide visitors, you can offer buttons they can click.
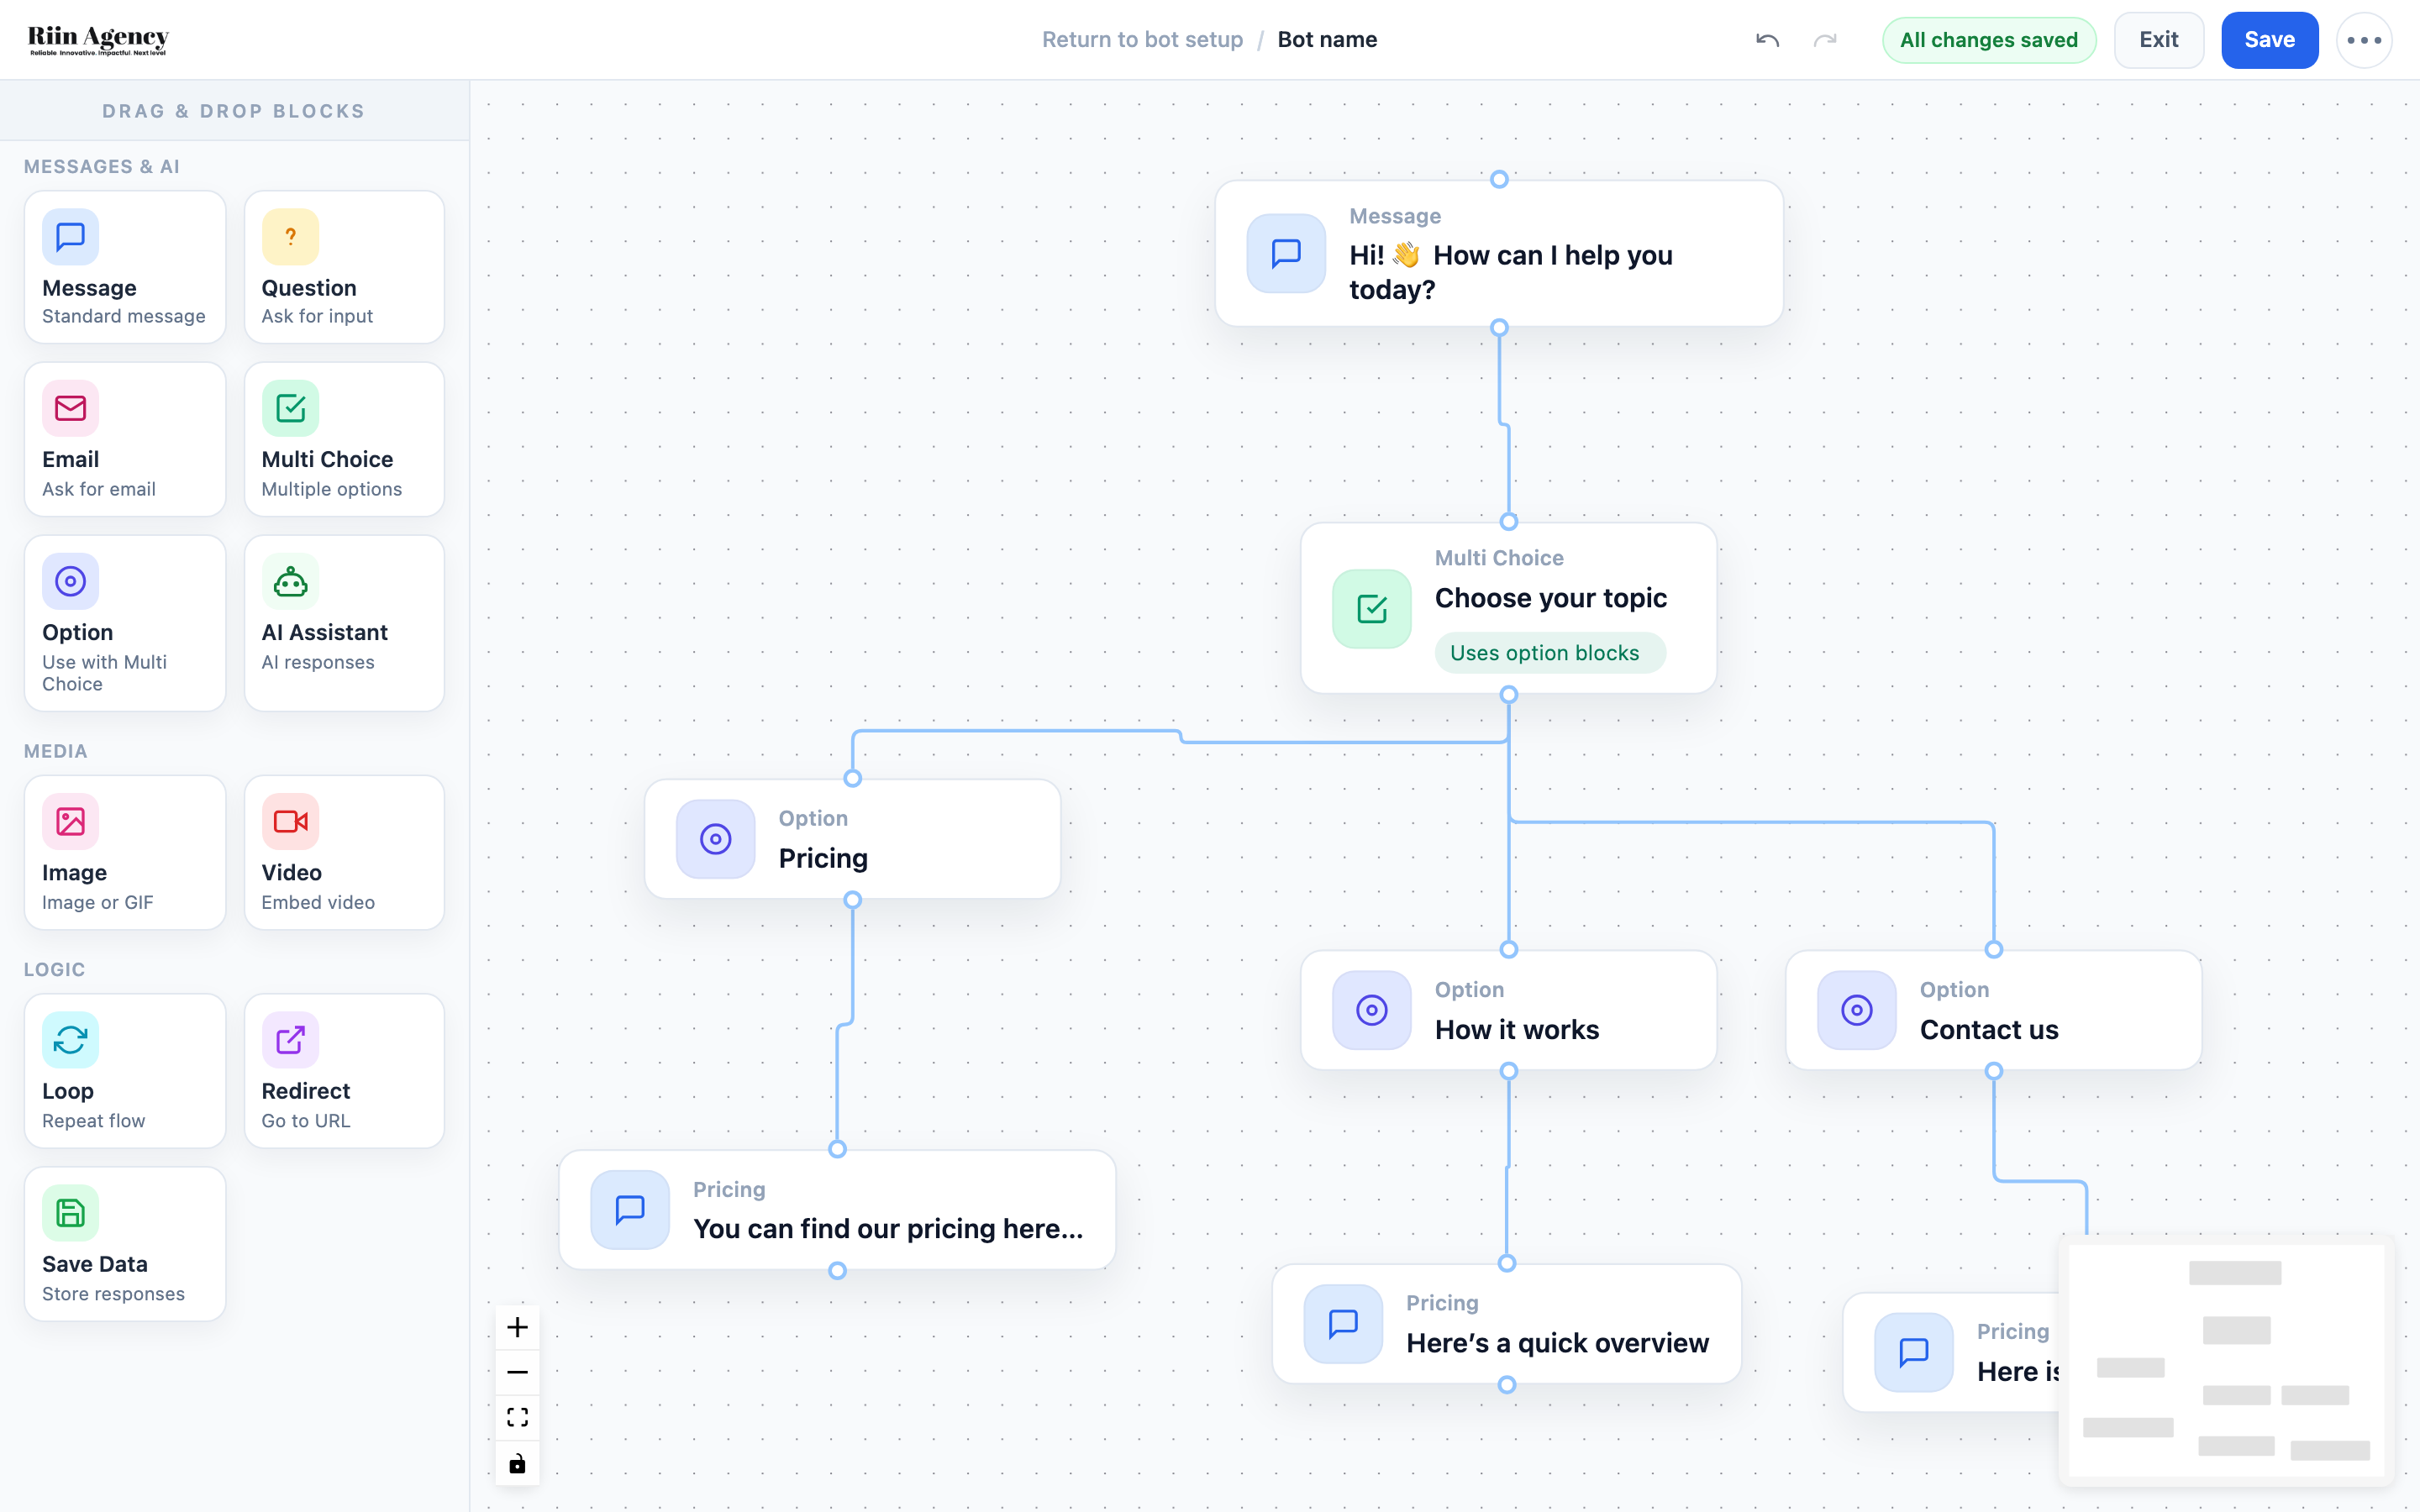
- Add a Multi Choice block and write the question (e.g. "Choose your topic").
- Add an Option block for each choice (e.g. Pricing, How it works, Contact us).
- Connect each Option to its own branch in the flow.
Step 8: Test your bot
Go to Widget Style in the left sidebar and try the chat preview. Type an answer and watch the bot use your name:
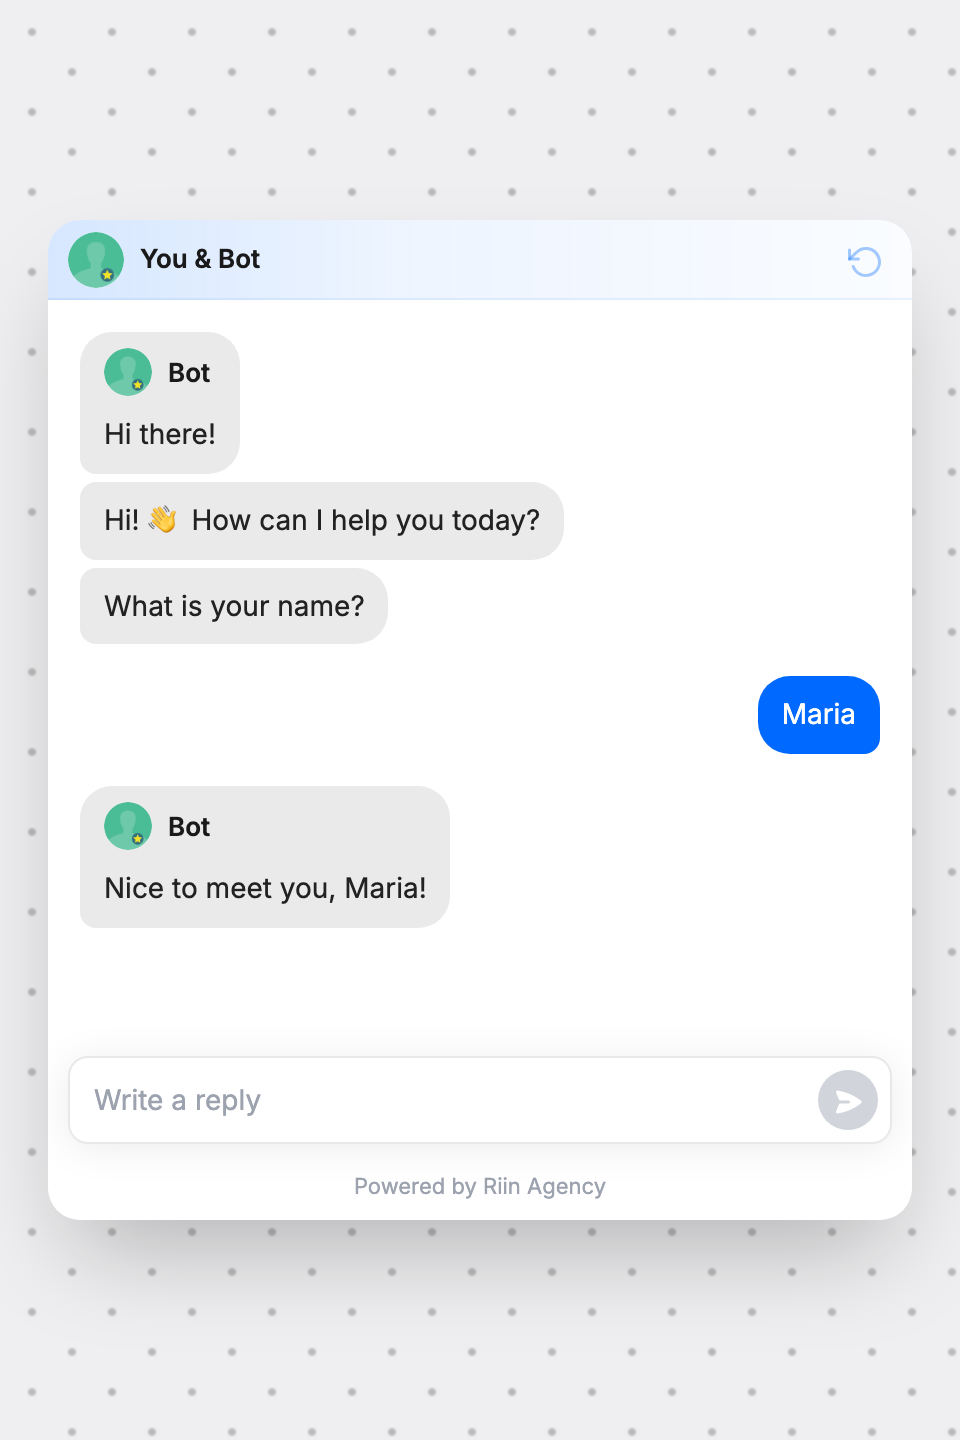
It works! The bot asked the name, saved it, and used it in the next message.
Step 9: Save and publish
- Click Save (top right) — do this often while building!
- Install the bot on your website: see Embedding Your Bot.
You've just created your first chatbot 🎉