Embedding Your Bot on Your Website
Once your bot is ready, you need to add it to your website. The Integration Code page provides the embed…
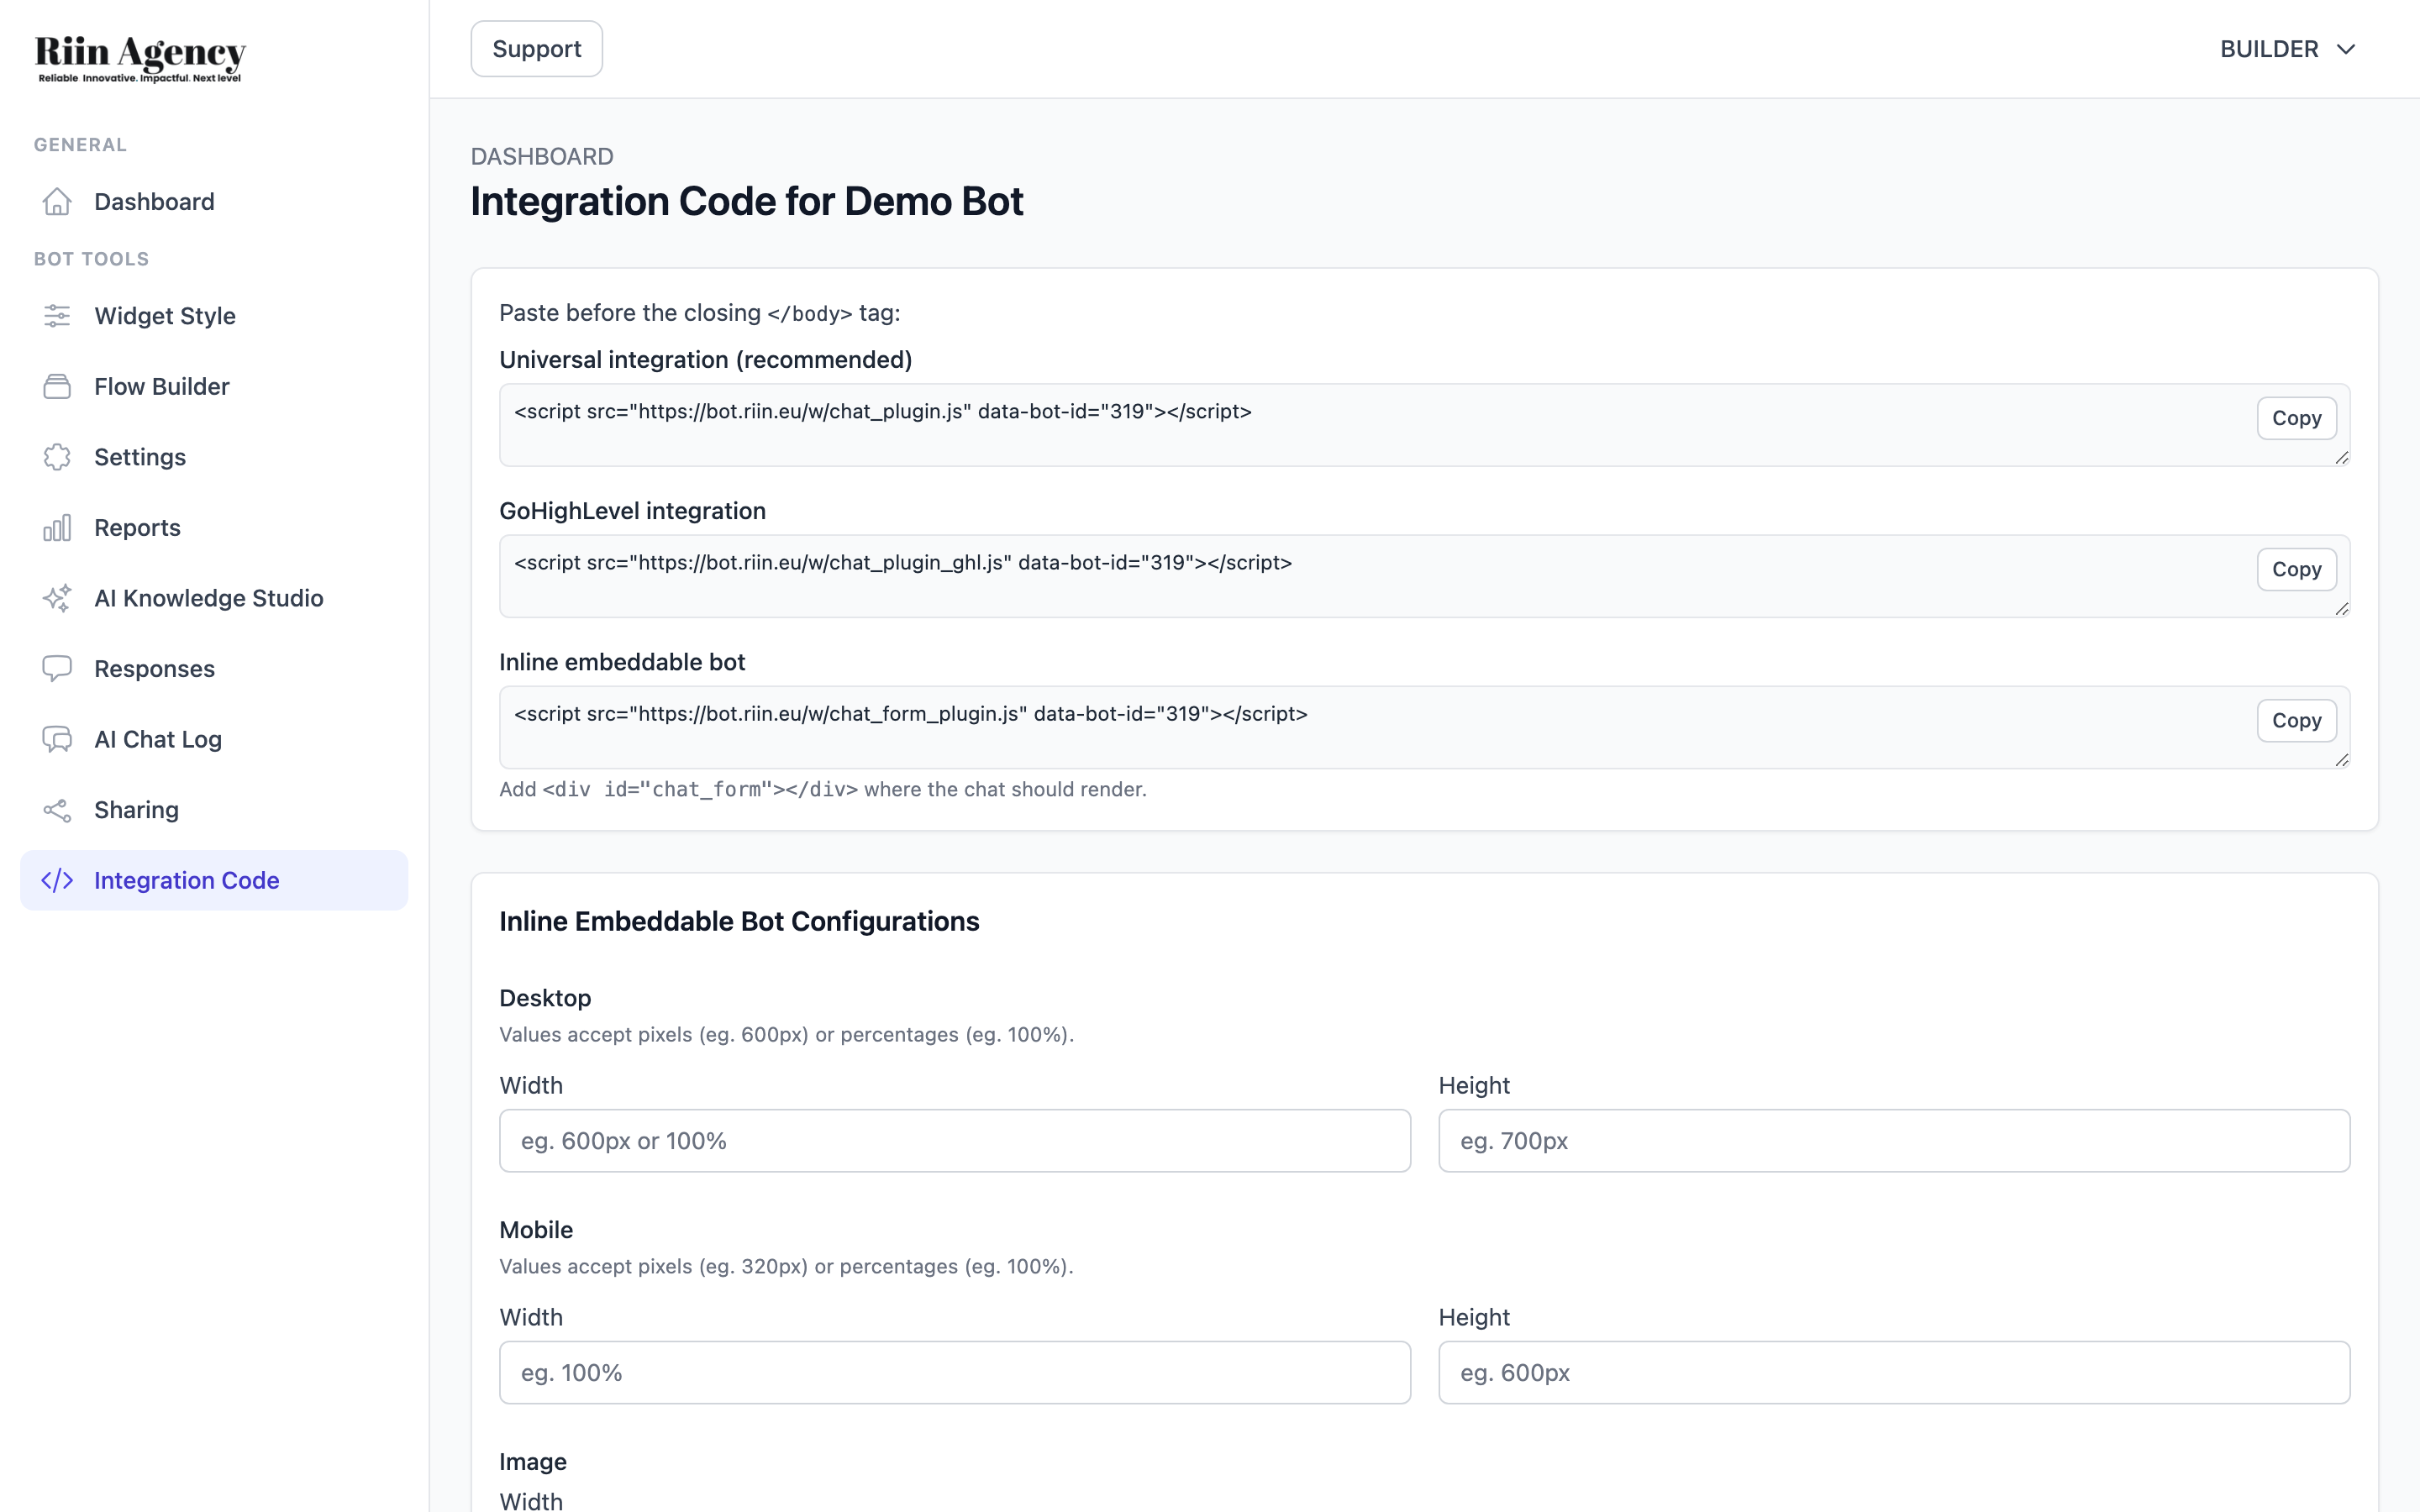
Once your bot is ready, you need to add it to your website. The Integration Code page provides the embed code for your bot. Open any bot, then click Integration Code in the sidebar.
Embed Options
You’ll find three types of integration code:
Universal Integration (Recommended)
This is the standard embed method. Copy the script tag and paste it into your website’s HTML, right before the closing </body> tag. The bot appears as a floating chat icon in the corner of your page.
This works with any website: HTML, WordPress, Shopify, Wix, Squarespace, and more.
GoHighLevel Integration
A variant specifically optimized for GoHighLevel (GHL) pages. Use this if your website is built on GoHighLevel.
Inline Embeddable Bot
Instead of a floating chat icon, this embeds the chat window directly inside your page content. Use this when you want the chatbot to appear as part of the page layout rather than as a pop-up.
Copy the script tag and also add <div id="chat_form"></div> wherever you want the chat to appear on the page. You can configure the width and height in the Inline Embeddable Bot Configurations section below.
Platform-Specific Instructions
WordPress
Install a plugin like “Insert Headers and Footers” (WPCode) or go to Appearance → Theme Editor → footer.php. Paste the code before </body>.
Shopify
Go to Online Store → Themes → Actions → Edit code. Open theme.liquid and paste the code before </body>.
Wix
Go to Settings → Custom Code → Add Code. Paste the code and set placement to “Body – end”.
HTML Website
Open your HTML file and paste the code directly before </body> on every page where you want the bot to appear.
Testing
After adding the code, open your website in a new incognito/private browser window. You should see the chat icon appear. If not, see our troubleshooting guide.