
The Flow Builder is where you design how your chatbot talks to users.
You build conversations by connecting blocks together.
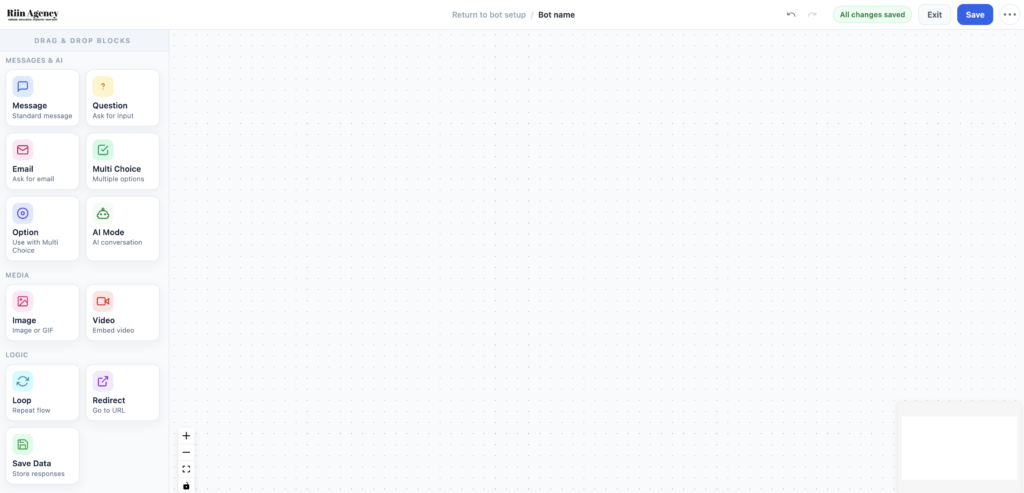
Flow Builder layout
The screen is divided into three main areas:
- Blocks panel (left) – message, question, buttons, AI blocks
- Canvas (center) – where your conversation flow lives
- Block settings (right) – edit the selected block
You create a flow by dragging blocks onto the canvas and connecting them.
Your first simple flow
Let’s build a simple, working chatbot.
This flow will:
- Greet the user
- Offer 3 buttons
- Respond to each choice
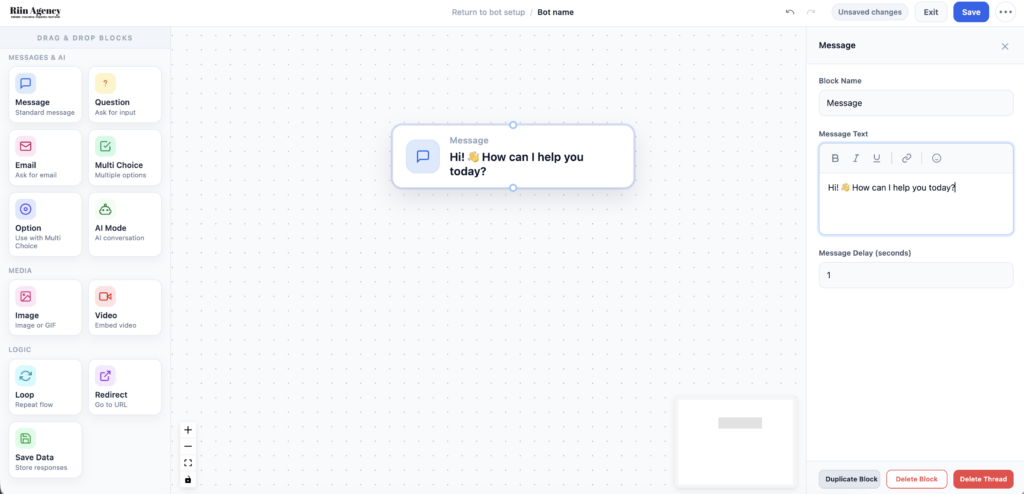
Step 1: Add a welcome message
- Drag a Message block onto the canvas.
- Write a short welcome message.
Example:
Hi! 👋 How can I help you today?
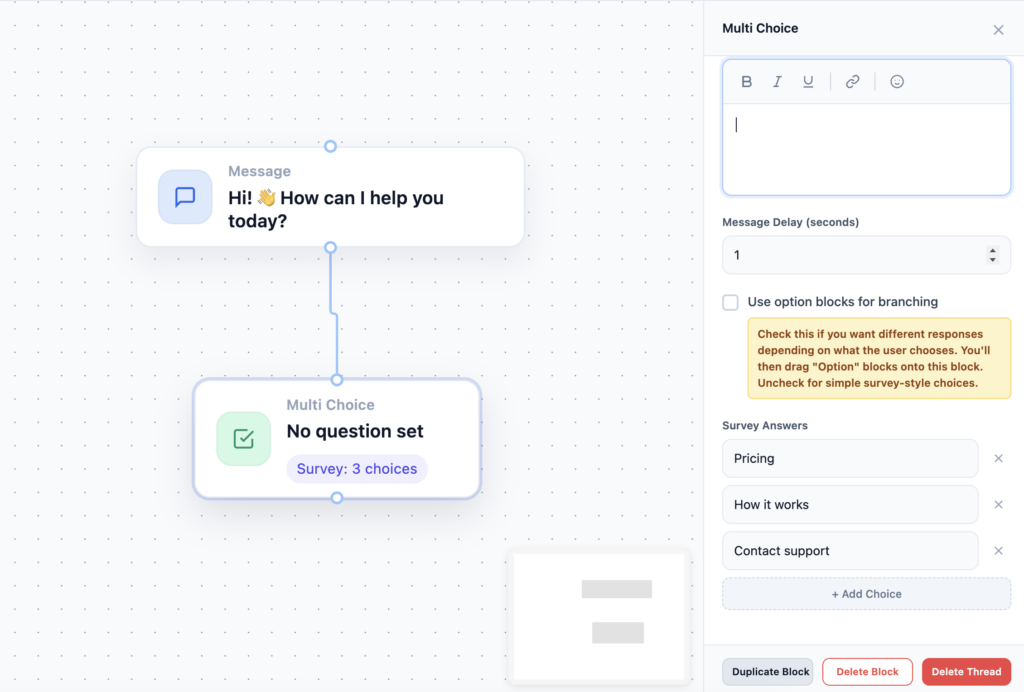
Step 2: Add buttons (Multi-Choice block)
- Add a Multi-Choice block after the message.
- Create 3 buttons.
Example buttons:
- Pricing
- How it works
- Contact support
Buttons guide users and prevent confusion.
Step 3: Respond to each button
Each button should lead somewhere.
- Connect each button to a Message block.
- Write a short response for each option.
Example:
- Pricing → “You can find our pricing here…”
- How it works → “Here’s a quick overview…”
- Contact support → “You can email us at…”
*screenshot_here* (Buttons connected to message blocks)
Step 4: Keep messages short
Good chatbot messages are:
- Short
- Clear
- Easy to scan
If you need long explanations, link to a page instead.
Step 5: Test your flow
- Use the preview to click each button.
- Check that every path works.
- Fix any dead ends.
*screenshot_here* (Flow preview test)
Common beginner mistakes
- Too many buttons
- Long text messages
- Buttons without responses
- Overcomplicating the first flow
A simple flow that works is better than a complex flow that breaks.
When to stop
Your first chatbot does not need to be perfect.
If users can:
- Understand what to click
- Get an answer
- Reach you
Then your bot is already successful.